A clean, scannable pattern for quick-insight dashboards
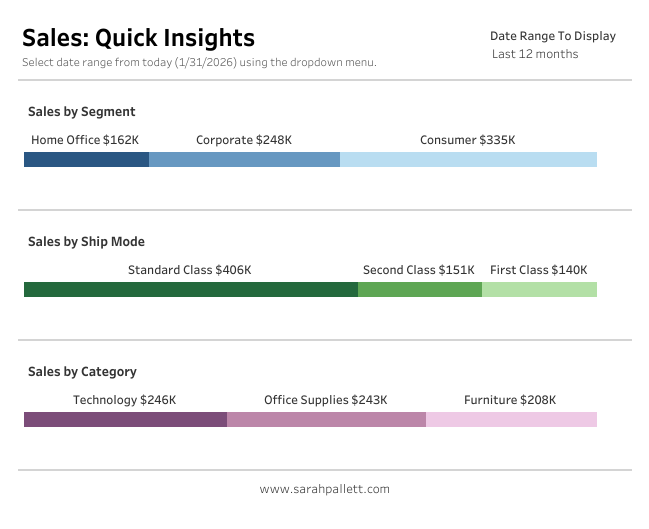
When you need to show how a total breaks down by segment, but don’t want users decoding legends or hovering for context, Labeled Segmented Bars are a great solution.
Also nicknamed At-a-Glance Bars, this pattern combines:
- Segmented bars
- Direct labels placed above the bar
- A clean, minimalist design that reads instantly
This makes them ideal for executive summaries, KPI sections, and overview dashboards where speed and clarity matter.
In this post, I’ll walk through how to build this pattern step-by-step in Tableau.
What Are Labeled Segmented Bars?
A Labeled Segmented Bar uses two synchronized bars layered on top of each other:
- A bottom bar that shows segments using color
- A top bar that exists purely to display clear, readable labels
Because the labels sit above the segmented bar rather than inside it, insights are immediate, with no legends and no guesswork.
Step-by-Step: How to Build Labeled Segmented Bars
1. Duplicate Your Measure
Start by duplicating the measure you want to visualize.
- In this example, I’m using Sales
- Create a duplicate field called Sales (Copy)
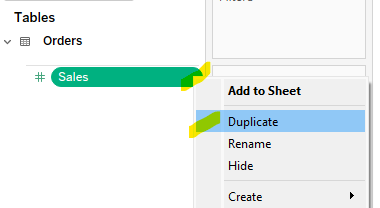
This duplicate allows us to layer two bars with different formatting.
2. Place Both Measures on Columns
- Drag Sales to the Columns shelf
- Drag Sales (Copy) to the Columns shelf as well
You should now see two bars side by side.
3. Add Measure Names to Rows
- Drag Measure Names to the Rows shelf

This helps Tableau manage the layered view once we switch to a dual axis.
4. Stack the Bars Using Dual Axis
Now we’ll layer the bars on top of each other.
- Click the drop-down arrow on Sales (Copy)
- Select Dual Axis
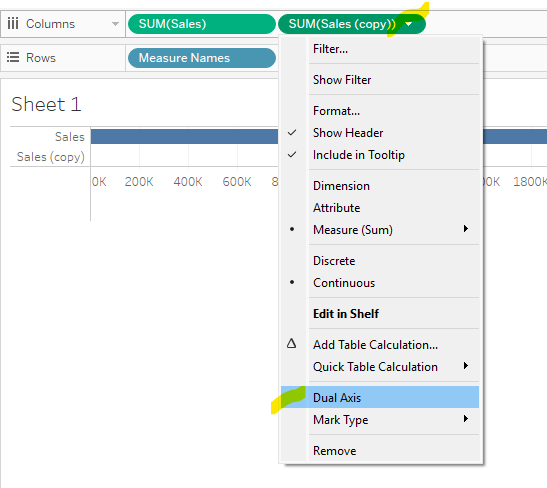
You should now see the bars overlapping.
Note:
When you select Dual Axis, Tableau will often default the marks to a Circle mark type.
If this happens:
- Go to the All Marks card
- Change the mark type from Automatic to Bar
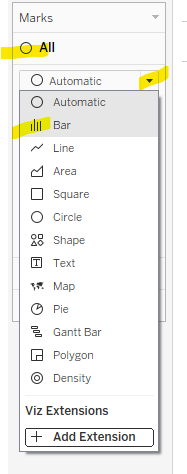
This ensures both layers render correctly as bars before you continue.
5. Synchronize and Clean the Axis
- Right-click on one of the axes → Synchronize Axis
- Right-click again → uncheck Show Header
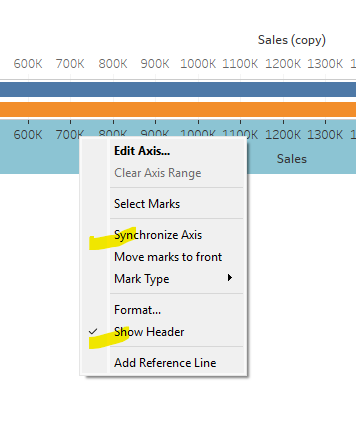
This keeps both bars perfectly aligned and removes unnecessary axis clutter.
Formatting the Bars
At this point, you’ll have three Marks cards:
- All
- Sales (top bar)
- Sales (Copy) (bottom bar)
We’ll use each Marks card intentionally to control the final look.
6. Format the Top Bar (Labels Only)
The top bar exists only to display labels.
On the Sales Marks card:
- Set Color to White
- Remove borders (no outlines)
- Add Segment to Label
- Add Sales to Label. Remember to format numbers. In this case we want $$ for Sales. Right click on the green pill, select Format and then set the formatting using pane on the left side.
- Edit the label text so Segment and Sales appear side by side
(Tableau defaults to placing them on separate lines)

This creates clean, readable labels that float above the segmented bar.
7. Format the Bottom Bar (Segmented Color)
The bottom bar provides the visual segmentation.
On the Sales (Copy) Marks card:
- Place Segment on Color
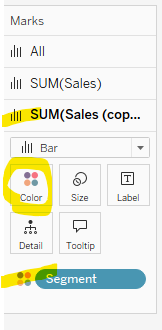
This bar shows the proportional breakdown by segment. Assign a color palette as desired.
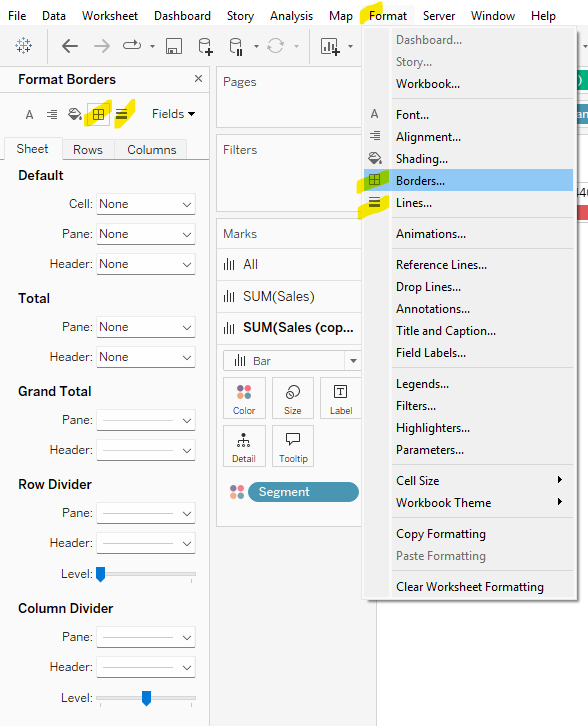
8. Final Formatting Cleanup
For a polished, dashboard-ready finish:
- Go to Format → Borders
- Remove all row and column borders
- Remove all row and column borders
- Go to Format → Gridlines
- Remove all gridlines and dividers
- Remove all gridlines and dividers
This keeps the focus entirely on the bars and labels.
When to Use This Pattern
Labeled Segmented Bars (At-a-Glance Bars) work best when:
- You want users to understand values instantly
- It’s important that labels remain readable regardless of color selection
- Legends would slow down interpretation
- The chart supports a summary or overview, not deep analysis
Common use cases include:
- Sales by segment
- Revenue by category
- Headcount by department
- Any “how does this total break down?” question
Final Thoughts
This pattern is simple to build, easy to reuse, and incredibly effective for dashboard communication.
By separating visual segmentation from label readability, Labeled Segmented Bars help users get the message at a glance — exactly what good dashboard design should do.
Here’s my version published on my Tableau Public portfolio page. Feel free to download and take a look under the hood!
Happy Vizzing!